Bonsai Society of South Jersey:
Yamadori Collecting Techniques
Flex Houvig
Background:
Collecting wild trees is one way to enhance ones’ collection. Mother Nature can do some very awesome things to a tree, giving it wonderful attributes which are enhanced when the tree is styled as a bonsai. However, there are many cases of folks trying to collect wonderful trees, only to have them die later.
One of the most common causes of this “yamadori death syndrome” is lack of knowledge of proper collecting techniques.
Basic Tools Needed:
The collector usually does not need a long list of tools to collect, and the list will vary, depending on where collecting is performed (mountains, back yard, or Pine Barrens), and how far one needs to travel from car or truck.
For the Pine Barrens-type environment (sandy loamy soils, some small rocks) the following should suffice:
• Thieving shovel or folding shovel
• Razor saw
• Clear packing tape
• Sharp pocket knife
• Heavy-duty (2 mil or thicker) black contractor garbage bags, one for each tree to be collected
• Root cutters
• Small backpack (for carrying tools)
• Shoulder sling (optional, for carrying collected tree back to car or truck)
• Heavy gloves
• One or more bottles of water
• Depending on time of year, bug spray may be needed. Long sleeved clothing and proper terrain shoes should be worn, as ticks may be present.
• Sunscreen (for very sunny days) and a ball cap, or rain slicker (for rainy days). Damp weather may also dictate use of Muck Boots, which are waterproof, yet comfortable to walk in.
Collecting Notes:
The following technique, when applied properly, will maintain the health of the tree for the short time it takes to collect and transport the tree to a location where it can be potted into a grow pot.
The basic technique requires wrapping the rootball tightly in a heavy black contractor garbage bag. The top of the bag is wrapped in a circular fashion up around the base of the trunk, and the clear packing tape is used to secure the bag in place. The reason a heavy plastic garbage bag is used is to keep the existing
moisture and micro-environment present in the roots intact. This will help ensure the survival rate of collected trees.
Note: when selecting a candidate tree, be mindful of whether the tree can actually be collected…some wonderful trees are better off left in place. A good example is a Virginia Pine, located on the side of awashed-out sand pit, whose roots go very deep into the soil. This tree will most likely die if these roots are cut so it can be removed. This points out that a sound assessment must be made of the "collectability” of the candidate tree.
DO NOT bare-root the tree when collecting…this will most likely kill the tree. DO NOT use burlap to wrap the roots; too much moisture will be lost, as well as fine soil.
Technique:
• Scout the area to find candidate trees. Look for trees which exhibit all or most of the attributes most valued in material suitable for bonsai. Also, and very importantly, verify that the candidate tree is healthy! If you collect a sick tree, it may either die shortly after collection, or transfer any disease present to your other trees…not very desirable;
• Assess collectability of candidates;
• At the first candidate, figure out where the “drip line” is located. Measure in 30% closer to the
trunk, and mark out a ring around the tree;
• Dig a trench at the ring, around the tree. Go down anywhere from 1 to 2 feet, depending on soil
consistency, so you can get below the rootball, and base of the tree;
• While trenching, you will find heavy roots, and lighter ones. Cut the heavier roots with the razor saw; try to keep the lighter roots; these will later be rolled up into the rootball;
• Once the trench is complete, insert the shovel at an angle under the rootball, and locate any stubborn roots located there. Large ones are cut, and smaller ones are kept. Work around the whole diameter of the tree, loosening the rootball;
• Lay out one of the heavy garbage bags flat on the ground, just next to the tree, and as close as possible. You will be placing the rootball ON TOP of, NOT IN the bag. This provides two thicknesses of the bag material to hold the rootball. Place the packing tape and knife close by;
• Verify tree and rootball are loose. Try to keep rootball intact, as this maintains the microenvironment around the roots;
• Tilt the tree and rootball to one side, and slide the bag under the rootball. Rock the tree to the opposite side, and rotate the rootball & tree so it is fairly centered on the bag;
• Starting at one corner of the bag, bring the corner up to the trunk, and wrap the roots at that side of rootball tightly into, around, or under the rootball. Wrap the corner of the bag around the trunk;
• Working around the bag, continue tucking the roots tightly into the rootball, and bringing the bag up and around the rootball, then around the trunk. The rootball should be held very tightly by the bag. The rootball cannot be loose within the bag, or the fine roots present there risk being broken off, resulting in major damage to the tree.
• Secure the wrapped bag tightly in position using the packing tape. Start at one of the ends wrapped around the trunk; fix one end of the tape there, and wrap the tape down over the rootball, and around the rootball, coming back up on the other side.
• Finally, once the rootball is tightly secured in the bag, move it out of the trench area, and fill the hole in, and smooth over.
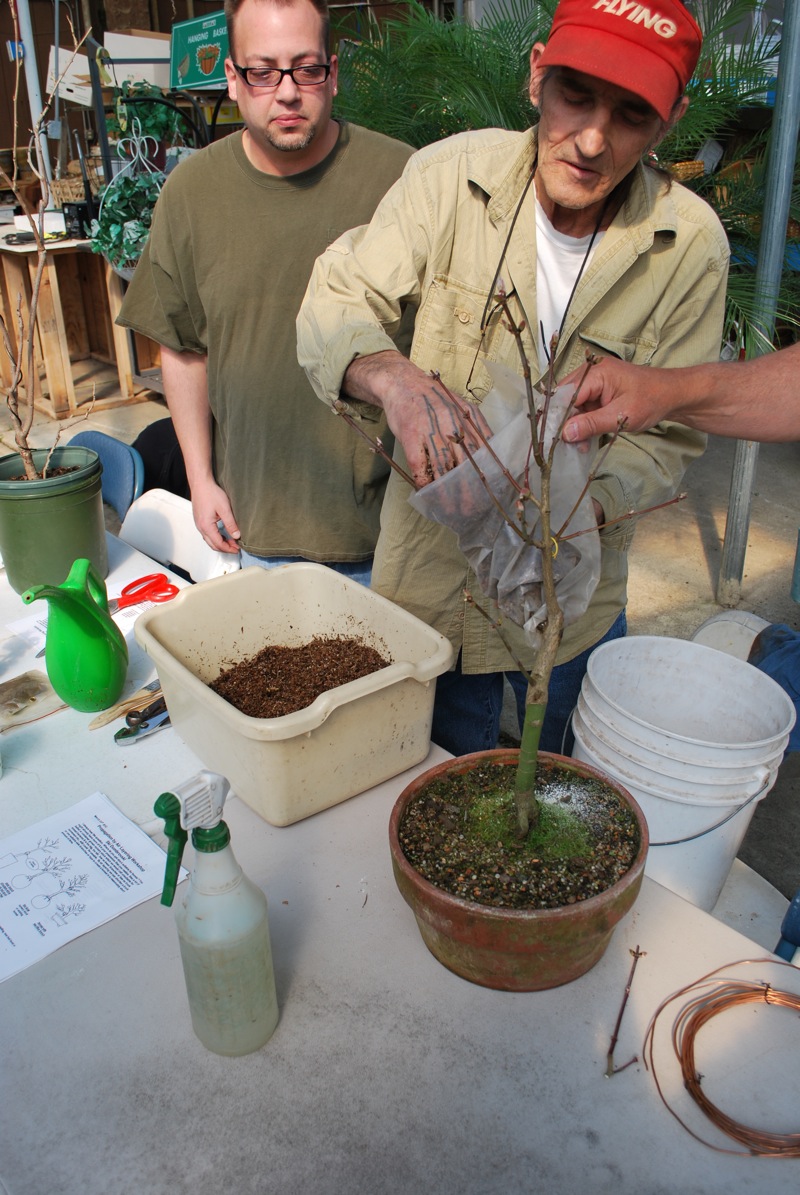
The tree is then carried back to the vehicle, and transported to a site where it can be put into a nursery pot. When the tree is potted, keep as much of the original soil as practical, around the rootball. It is OK to put into a very large pot, as you really want the tree to recover from the collecting ordeal.
Place the tree in a semi-shade area for recovery. Water well, so the whole inside volume of the pot is soaked. Mix in some Super-Thrive and some vitamin B root stimulator to help with root regrowth.
The tree should be watched carefully, and kept watered, and left to recover for a complete growing season. Attempt no work on the tree right after collecting. The work may begin the next year, if the tree has recovered its’ health and vigor.

 Pink Dogwood
 The Blueberry trees collected from Whitesbog are now blooming, and pushing out loads of new growth, so thought would share.
 Local bees have been visiting, so there is some chance of local fertilization, and maybe some berries will form later in the season.


 Here is the long road we came in on, probably 1.5 miles from the main road...
 We discussed with JW Burton where some nice collectible plants might be found....
 The swamps / bogs were like an Easter Egg Hunt (some locals were actually driving all the way back to where we were to ask about some Easter Egg Hunt that was happening somewhere nearby???)...anyway, found some nice old knobby wild Blueberries, probably 40-60 years old:
 These are now home and in nursery pots in dappled sun...will see how they pop out over the next few months.
 Here is some of the saw mill waste boards that were used to provide solid footing over the more boggy areas:
 We left tired and satisfied with our finds. JW was excited we took the initiative to come out and explore. We found that he is a man who enjoys the peace and solitude of the Pine barrens... as do we....thanks JW for a totally relaxing afternoon! I hope we can come back and explore more of your wondeful part of the Universe!
 Tom & Connie Kruegl were enthusiastic listeners of Walters'...
 Walter moved the group outside to discuss the old RMJ...
 Clearly this is a massive old tree. The group is speechless! Walter...you are going to do...what to that tree?
 Walter, after discussing the various options available in the tree, starts right in to "clean up the tree"...
 ...and then moves on to discuss the next steps, so they are clear to those who will next work on the tree...
 So, once the group is comfortably started working on the various details of tree cleanup, Walter can relax, still keeping a watchful eye...
 Eric, all the way from near Cleveland, steps right up to the carving suggested by Walter. A really neat face mask is provided by Jim Doyle for protection...
 All who watched this work were amazed someone would attempt to style a tree that was already "old" when Christ was born. In actuality, Walter was showing that there is no difference in the techniques, or in the care given, between a young 200 year old and a 2000 year old tree!